
Bleeds: Needed for Most Print Jobs
If you have graphics that go to the edge of your artwork, it needs to have bleeds!
Have you ever tried to cut out something, such as a picture, as close to the edge of the content as possible only to leave a small sliver of blank paper? At The Thomas Group, we do our best to make sure this doesn’t happen but it can be difficult when cutting out hundreds of business cards, or dozens of menus, and so on, with artwork that wasn’t designed with “bleeds”. This page will help explain what bleeds are, what they do, and how to set up your artwork to have bleeds, and of course if you have any questions about bleeds feel free to contact us!
What are bleeds?
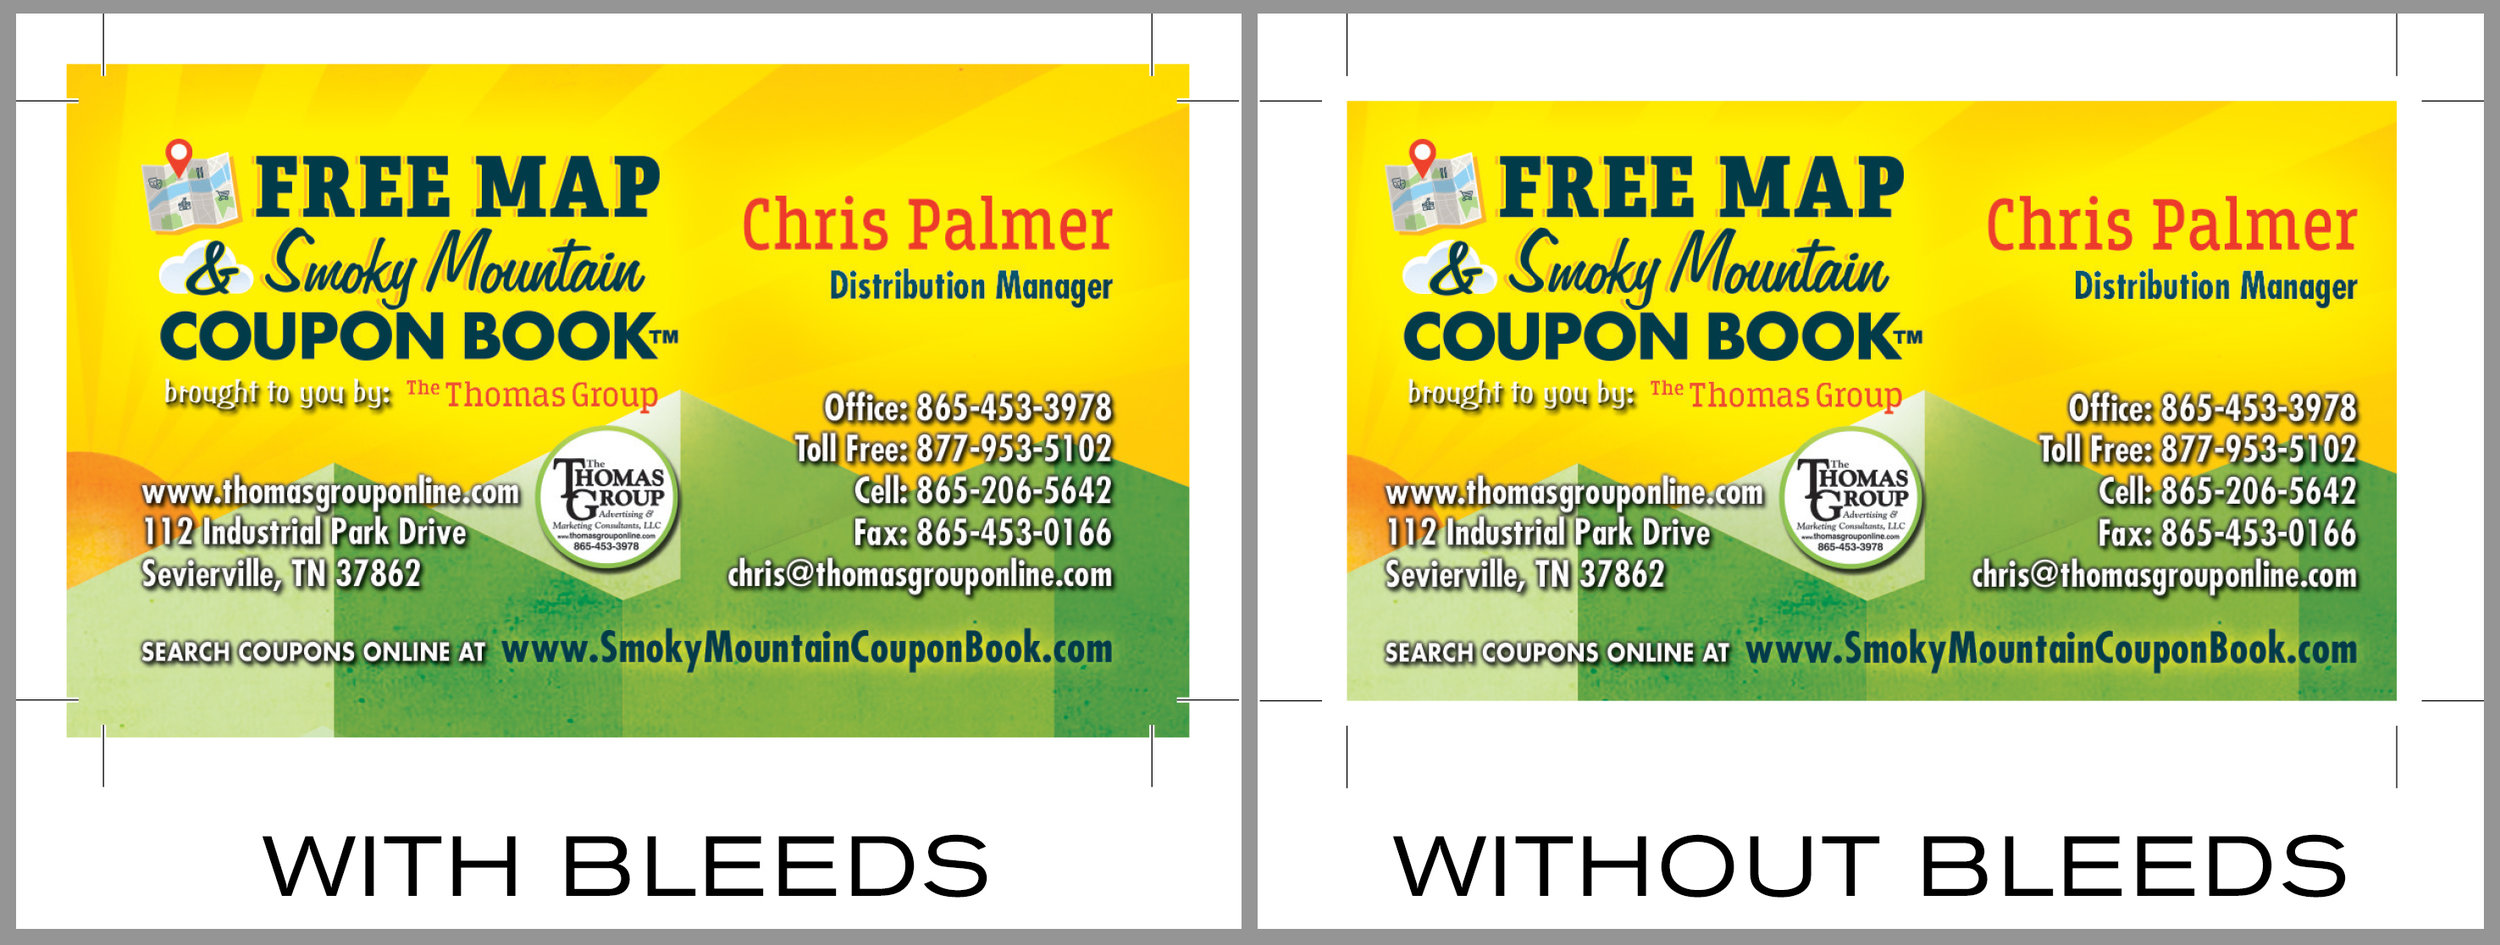
Bleeds refer to artwork that extend beyond the trim dimensions of the final product. For example, if you have a business card that is 3.5” wide and 2” tall when it’s trimmed out, the artwork would extend beyond these dimensions of 3.5” x 2”. The reason for this is it is nearly impossible to cut out artwork perfectly on the trim line, which will consequently result in an unsightly sliver of blank paper where the artwork stops. With bleeds however, because the artwork extends beyond the trim line, we no longer have to worry about unsightly areas on the final product where blank paper is showing.
How do I setup my artwork to have bleeds? How much bleed do I need?
Setting up your artwork to have bleeds is a fairly simple process but can vary from program to program. Programs like Adobe Illustrator and Adobe InDesign allow you to designate how much “bleed” you want to have when setting up the document, while programs like Adobe Photoshop do NOT have a bleed setup option, which means you will have to manually add bleeds to your artwork which can be confusing.
Here is a quick guide on how much bleed to add to your document when printing with The Thomas Group:
The Thomas Group typically requires 1/8th (0.125) bleeds on artwork.
This means that 1/4th (0.25) of an inch will be added onto to the height and width of what the final trimmed product will be, because 1/8th of an inch is being added to the top, bottom, left side, and right side of the artwork.
For example, a business card which is 3.5” wide and 2” tall is actually 3.75” wide and 2.25” tall when 1/8th (0.125) of an inch bleed is added.
In Adobe Illustrator and InDesign, you can tell those programs to add the bleeds in the “Document Setup” menu inside the “File” menu.
NOTE: When exporting PDFs from these programs, you MUST include your bleeds when exporting, otherwise they will be trimmed off!In Adobe Photoshop, there is no “bleed” option, so you will have to add on the bleeds to the dimensions of your artwork. If you add 1/8th” bleeds to the artwork it will add 1/4th of an inch to the overall height and width of the artwork.
Does everything have to be setup with a bleed?
While most print projects will need to be setup with bleeds, for projects that don’t have colors and/or graphics going to the very edge of the final product, these projects don’t have to be setup with bleeds. A good example of a project that does need bleeds would be white business cards. Because there is no background color or graphic that goes to the very edge of a white business card, there is no need for bleeds because we want to see the white paper in this instance. In addition to easier setup, another positive for products without bleeds is that we may be able to fit more on a single sheet of paper and cut them out in less time, which could reduce the cost to print your project.